By Gary Wood, Project Manager, HomeWrights Custom Homes
Editor’s Note:
The author on this blog post is our Project Manager, Gary Wood. He’s an award-winning, extremely competent and experienced builder.

Gary Wood – Project Manager
It goes without saying, he’s the kind of guy that can literally jump in and get this stuff done. The reality is, you may or may not be the one to do the hands-on performance improving techniques described below. However, if you apply these techniques your custom home will have dramatically improved energy efficiency.
Even if you are not the one to roll up your sleeves, this article will give you enough insight to ask intelligent questions of your framer so you can build a High-Performance House.
Consider sharing this article with your subcontractor and discuss the benefits of air sealing.
Air Sealing Part 2: Foundation / Wall Framing
There is a superabundance of holes in a house where air can penetrate. These holes or gaps become evident during framing. Perfect framing does not exist and even if it did air would still move through a house somewhere. Additionally gaps can develop as the house ages and things begin to settle.
You may have a super-insulated house but, if it allows too many ACH (air changes per hour), it’s negating everything that you’ve done with insulation. Air tightness trumps R-Value.
So what’s the solution to constructing an energy efficient high-performance house with fewer (ACH) air changes per hour? Answer: Air Sealing. By building airtight you’re controlling the environment instead of the environment controlling you.
By utilizing the latest building science can help you build a comfortable energy efficient home. What follows are the three redundant steps to air sealing the foundation to framing. Keep in mind that redundancy is the key to air sealing.
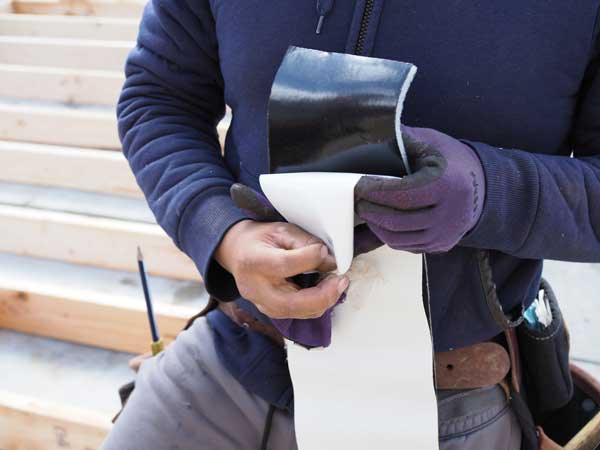
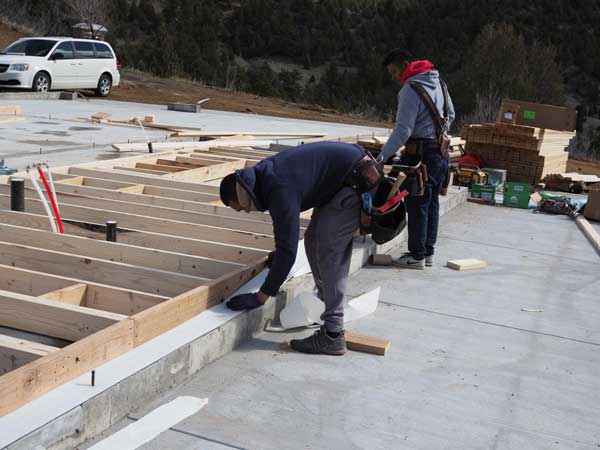
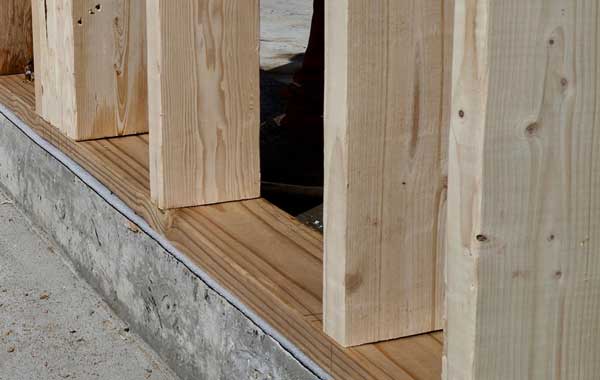
The first step of air sealing takes place at the framing stage of construction. To achieve an air-tight seal between the sill plate and the foundation it’s important to add a gasket.
There are specialty products available for this purpose such as Protecto Wrap’s® Energy Sealer (Photos 1, 2, & 3) or you can use of a roofing membrane such as ice and water shield or other rubberized-roofing products applied along with a closed-cell foam gasket.
Note that the thicker closed-cell foam gasket helps to fill in the irregularities at the top of the foundation wall.
Photo 1
“Air tightness trumps R-Value.”
Photo 2
“By building airtight you’re controlling the environment instead of the environment controlling you.”
Photo 3
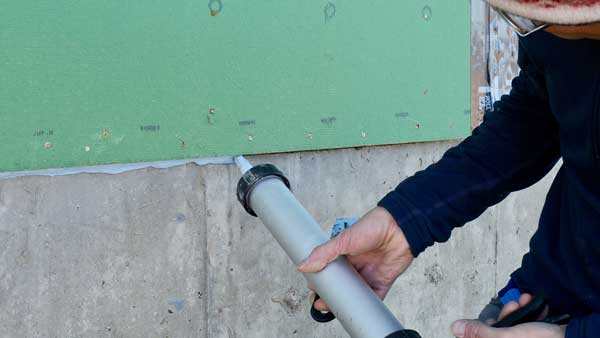
Once the walls have been erected the next step is to apply a liquid flashing at the joint between the top of the foundation and the framed wall. Henry Air Block®, Poly-Wall Blue Barrier Joint Filler® and Sto Rapid Guard® are three liquid flashings that we have used successfully.
These paste like liquid flashings are easy to use and are applied with a caulking gun and putty knife. (Photos 4 & 5)
They also make it very easy to effectively seal other gaps in the framing, rough openings including windows and around through house penetrations including pipes and vents.
Photo 4
“Consider sharing this article with your subcontractor and discuss the benefits of air sealing.”
Photo 5
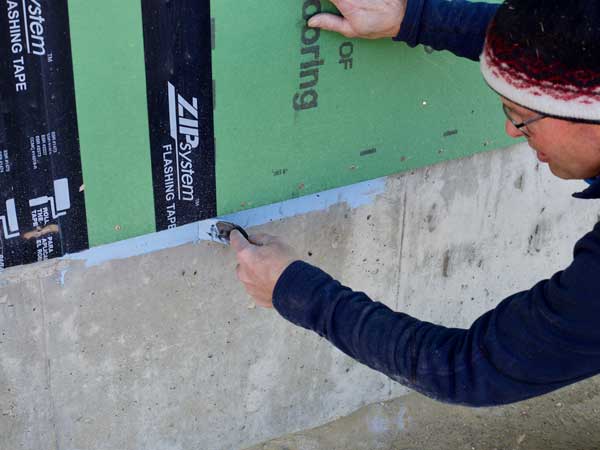
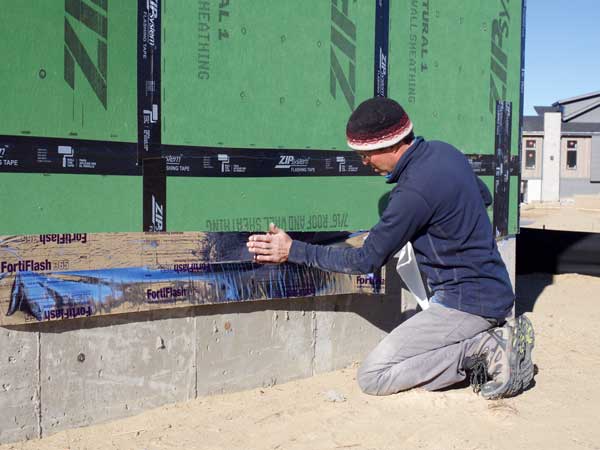
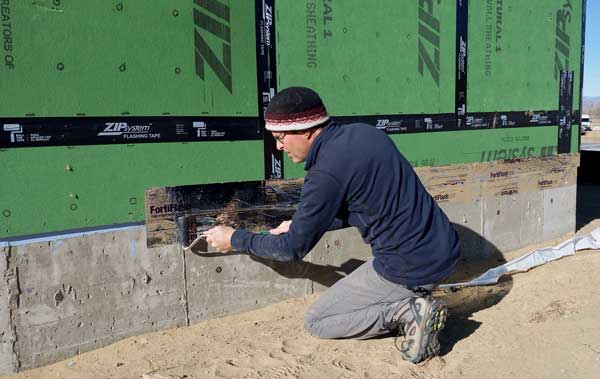
The third step is to apply an air and water resistive tape across the framing and foundation joint. Select a 6” or 9” wide peel and stick tape for overlapping equal parts of the foundation and framing.
For the project shown in the photos the owner/builder chose Henry Fortiflash 365®. For proper adhesion and to perform as expected be sure to apply a primer to a clean foundation wall and use the roller because these tapes are pressure activated. (Photos 6 & 7).
Photo 6
“Keep in mind that redundancy is the key to air sealing.”
Photo 7
Finally, apply a silicone caulk to seal the corners at the foundation/framing wall where the sill plates are butt jointed and around the inside perimeter where the sill plate meets the foundation wall.
Follow these steps, keeping in mind that redundancy is the key, and you’ll be on your way to building an energy efficient or what we call a “high-performance house.” Watch for our next article on air sealing the rest of the house.
See related article: The Comfortable Home: Air Sealing
Disclosure: The products mentioned in this article are the ones that we have had success with. We have received no compensation from the manufacturers mentioned in this article.
Post Script: If you want to be your own contractor and build exactly what you want, we’re here to support you. Building a home is not rocket science but it is complex.
With the right guidance, and an understanding of the latest building science you can build the energy efficient, high-performance house of your dreams and save a lot of money in the process.
Every custom home is unique and HomeWright’s has a team of professional builders to partner with you as you build wealth for your future by acting as your own custom home builder.
Whether you’re taking advantage of our Owner-Builder program or our Turnkey approach to building your custom home, recognizing the issues related to air sealing will prove helpful in creating your High-Performance House. Whether you’re in Colorado Springs, Golden, Boulder, Englewood, or anywhere in the Denver area, understanding how air sealing protects your investment is important.
Questions about making your home energy efficient? Call HomeWrights Custom Homes: 303-756-8870
Owner-Builder Comments
See one of HomeWrights Custom Homes Owner-Builder clients in Erie, Colorado. Gary Wood is the Project Manager on this project. Is acting as your own general contractor right for you? Want to save a lot of money and build it YOUR way? Watch this video and call us with your questions!
Call with any questions: 303-756-8870